Verplank’s IxD Framework
I got a lot out of reading Verplank’s IxD Framework. One great takeaway was to be mindful of the mapping time between the feel and know functions, as this has always been a criticism with many musical installations. There is often not a clear path between Do & Know, so that users are left puzzled, assuming they hear a difference, when in actuality, only the designer knows what is going on and the doesn’t know the user doesn’t. This is a process that I would want to avoid in my design. As such, I believe the Wand project will give users the ability to have direct mapping to the experiences they feel and will know quickly how to manipulate these environments. Here is my design as mapped out on Verplank’s Framework.
The Wand-ton?
One area I would like to feature is the Display area. This is inspired by the Yamaha Electone series of organs which are in the spinet lineage. My family had one in our home growing up that resembled the second photo below. Being an all-analog organ, it was a marvel of analog technology, built up over many decades of design expertise. While searching online, I must have found 10-15 similar models, none of which were exactly like the layout we had. Nonetheless, this organ had a number of useful features that I would like to incorporate into my design.
The Yamaha Electone E-70 - a bohemoth.
The Yamaha Electone B-45 - the home version.
The Electone that I grew up is pictured on the right which had a smaller feature set and allowed the user to control the following parameters:
Tempo - via a single knob
Rhythm - via buttons to pick pattern patterns
Bass - via buttons to choose pattern, based on the lower manual input
Accompaniment - chord inversions and pattern, overlaid on the lower manual input
Timbre - via buttons and sliders for the upper and lower manual
Not pictured: single button click on the wand.
In addition, there were footpedals, a built-in spring reverb, and tone controls over the rhythm elements! I still have this organ back in Nashville and have used it on my recordings over the years.
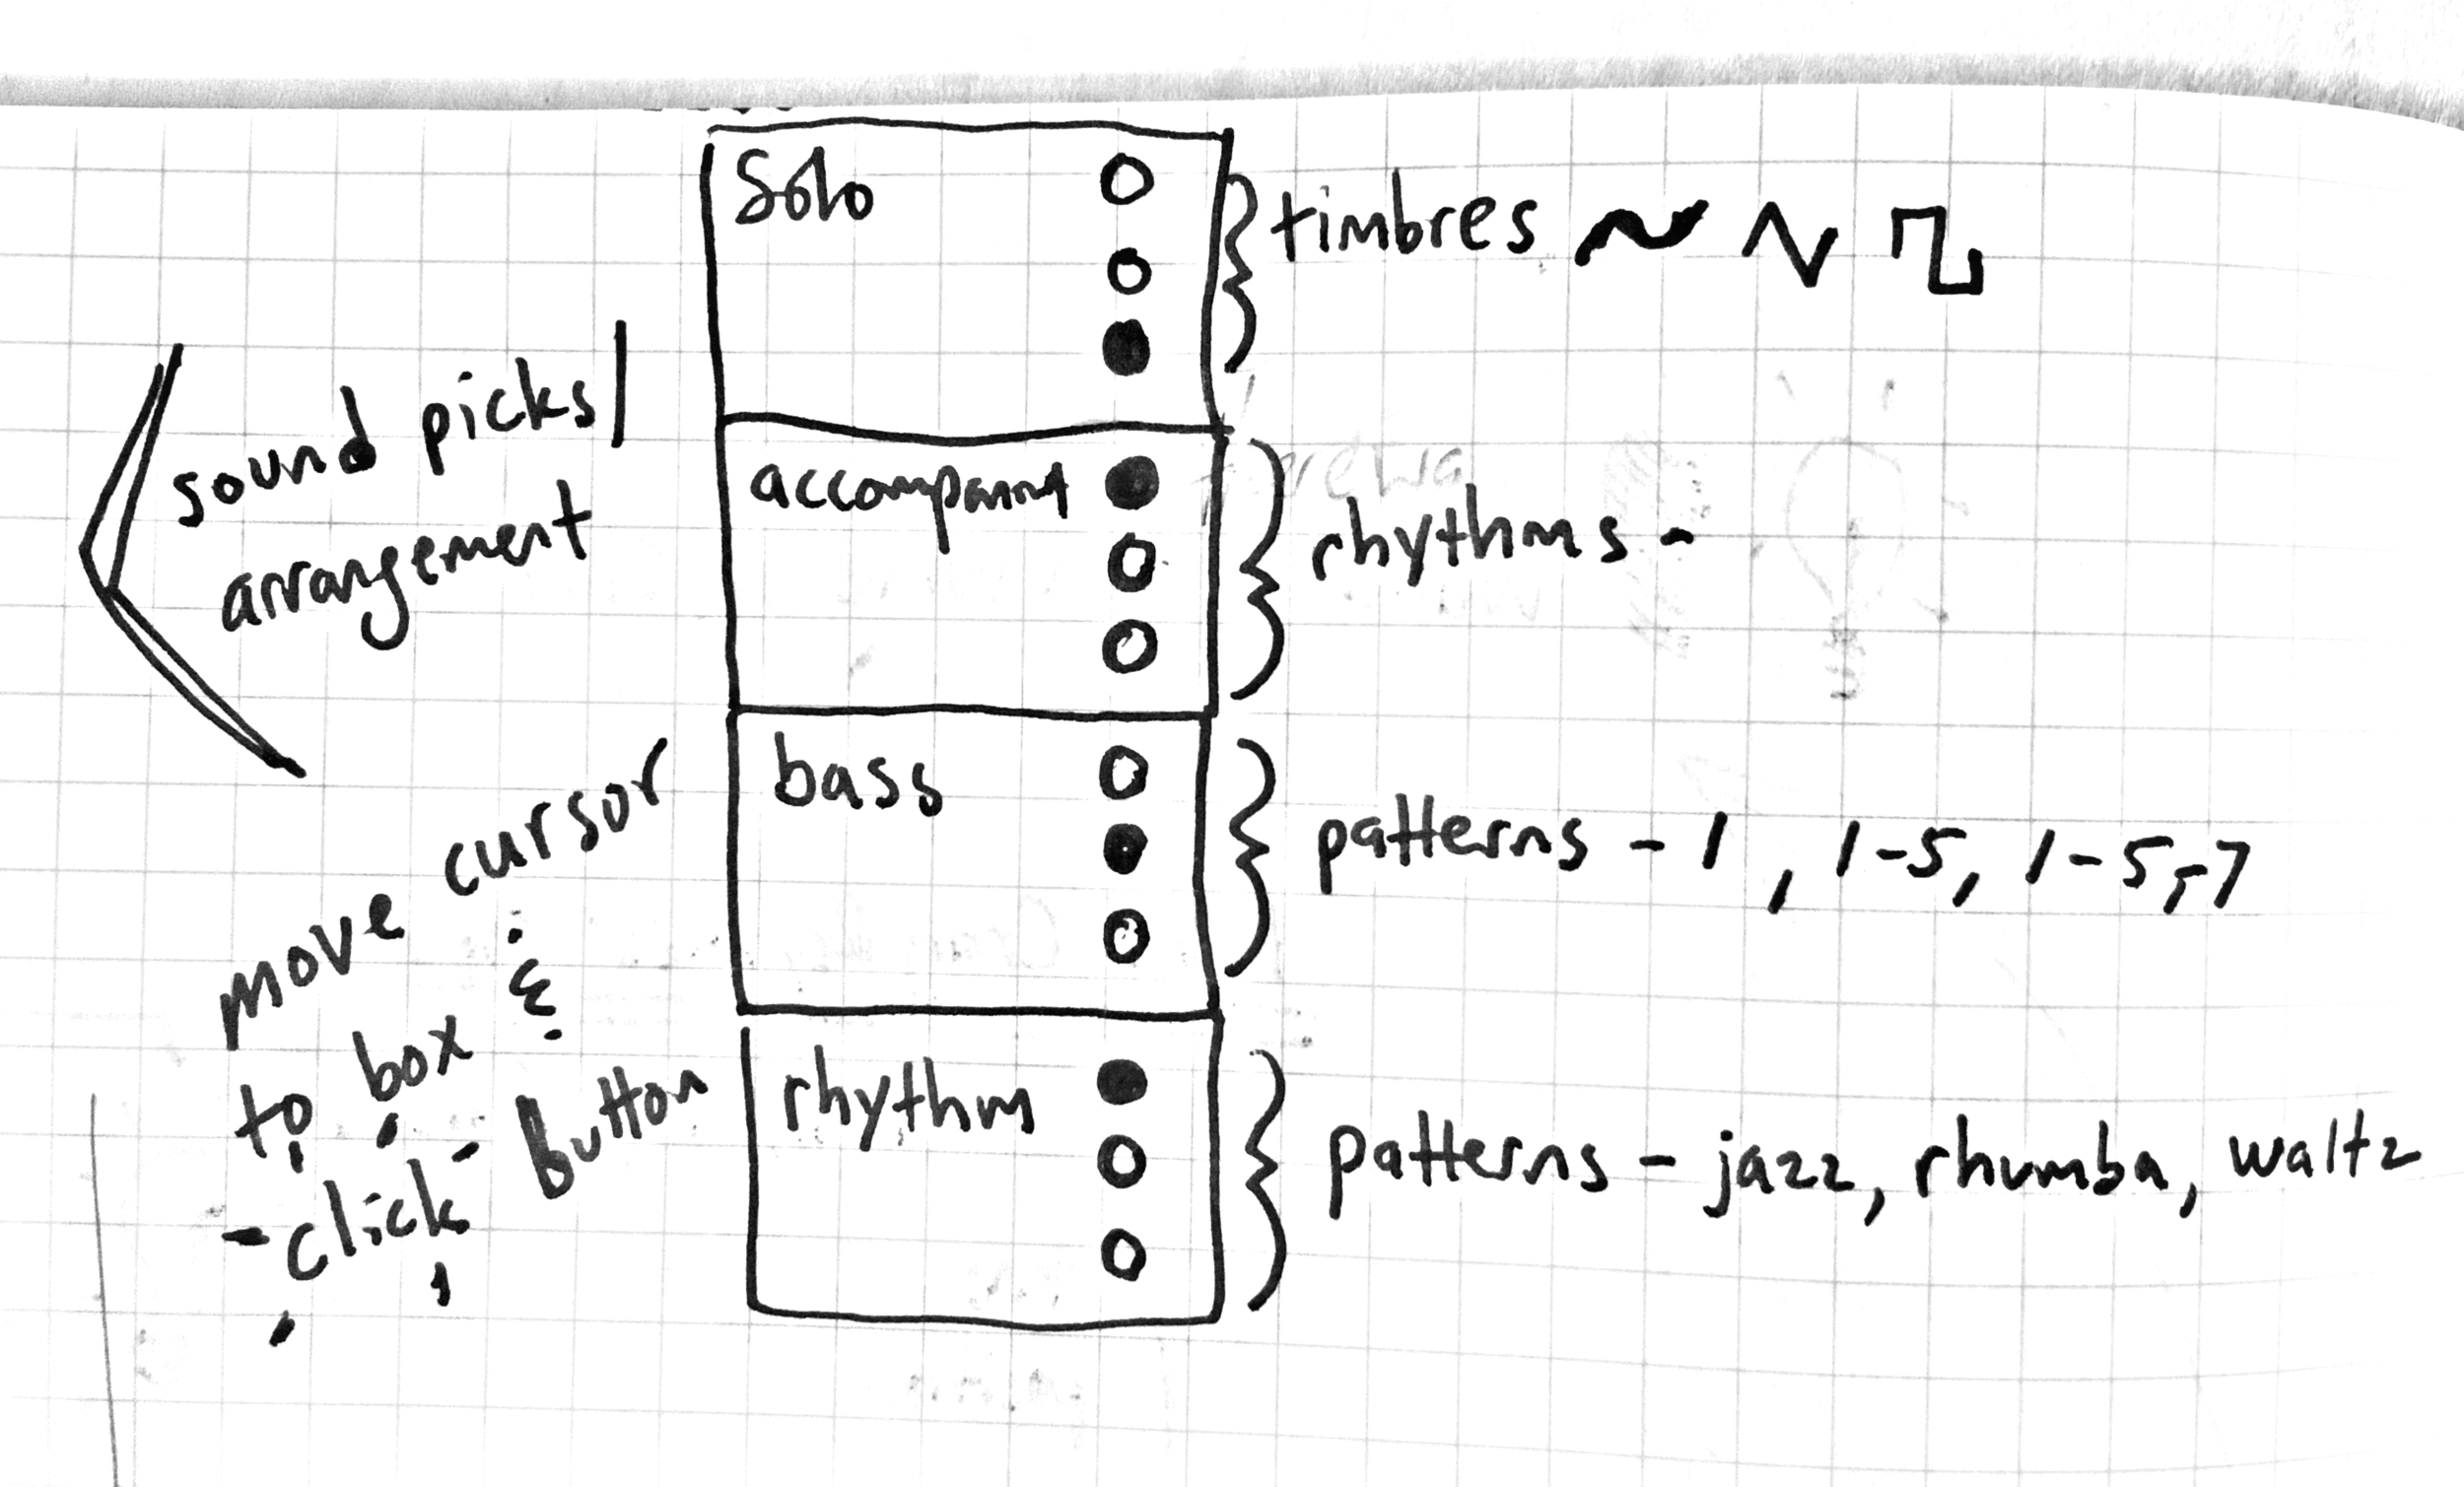
As you will see below, I have taken these elements and mapped them onto my display below with the additional parameter of Solo. Since there will be no keyboard manuals on my device, the user will use the wand to control an cursor on screen. By using the wand’s single button, they can hover and click to cycle through preset chord progressions, which the bass and accompaniment will follow, much in the same way the rhythm patterns are pre-set.
Finally, users will have the option to then choose a musical mode or scale to “Solo” with by waving the wand left and right on the x-axis to sweep up and down the note scale over a two octaves. The scales are taken from the Animoog App, as pictured below.
The Animoog - a synth app by Moog.
7-Axis Dimension Space Diagram
This was a helpful exercise in seeing where my project falls on a number of useful evaluation modes and also opens up the project to other possibilities, some of which I have added in red in the diagram. I could add a control box to give users more control, as well as adding sounds as the user “clicks” an item on the screen.
Do // Feel // Know ↵
Do: Pick up the wand
Feel: Hear a sound
Know: How you move the wand effects the sound ↵
Do: Move the wand side to side
Feel: Hear the pitch go up and down
Know: That the pitch is tied to the wand movement
Do: Pick up the wand
Feel: See the screen light up
Know: The wand is tied to the screen somehow ↵
Do: Move the wand
Feel: See the cursor on the screen move
Know: That the cursor is tied to the wand’s movement ↵
Do: Move the cursor to different places on the screen
Feel: See the screen change colors when the cursor hovers over each area
Know: That there are areas you could choose ↵
Do: Click the button on the wand
Feel: The button make an audible clicking sound
Know: That the button “chooses” items on the screen
I didn’t get the chance to prototype these behaviors. The next steps for me are to build the wand, which is just a recreation of a PCOMP mid-term project from last semester. And then I need to explore how to trigger sounds from p5 and compose them as loops in Ableton.


